You haven't signed in yet, you can have a better experience after signing in
*Please complete the payment within {{receiveCouponInfo.expire_at}}Previous use*
You haven't signed in yet, you can have a better experience after signing in
 RadiAnt DICOM Viewer DICOM medical imaging browsing and viewing software
Activity Rules
1、Activity time:{{ info.groupon.start_at }} ~ {{ info.groupon.end_at }}。
1、Activity time:cease when sold out。
2、Validity period of the Group Buying:{{ info.groupon.expire_days * 24 }} hours。
3、Number of Group Buying:{{ info.groupon.need_count }}x。
Please Pay Attention
1、Teamwork process: Join/initiate a Group Buying and make a successful payment - Within the validity period, the number of team members meets the activity requirements - Group Buying succeeded!
2、If the number of participants cannot be met within the valid period, the group will fail, and the paid amount will be refunded in the original way.
3、The number of people required and the time of the event may vary among different products. Please pay attention to the rules of the event.
Flexible, simple, and fast
The design is meant to provide you with a unique experience, with an intuitive interface and unparalleled performance. Your experience is sure to be overwhelming!
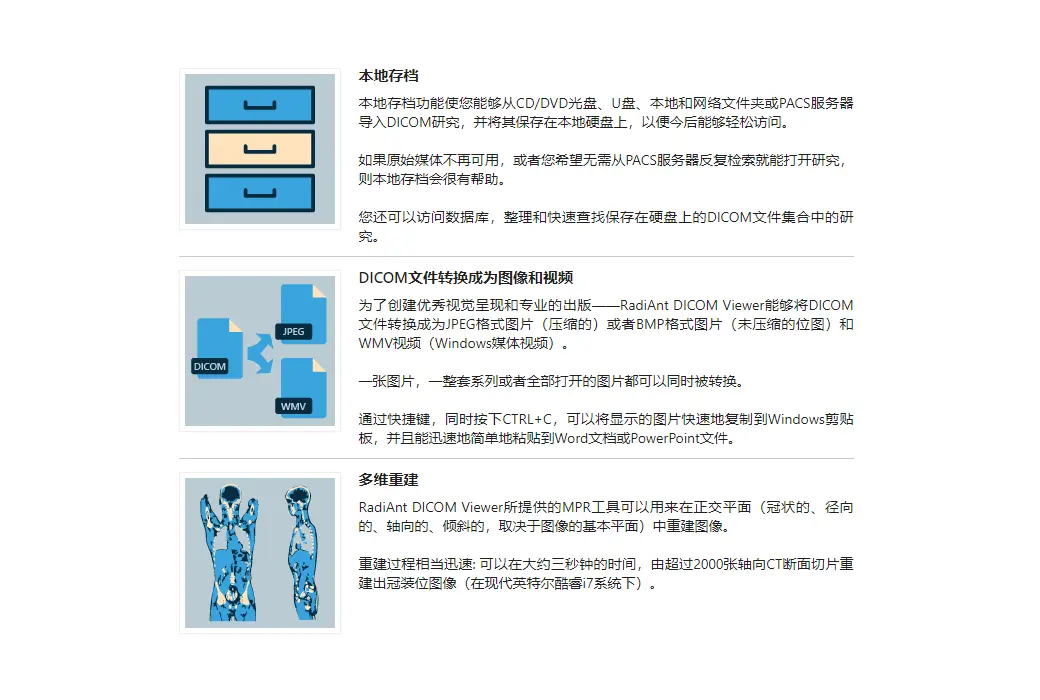
Patient's CD/DVD DICOM Browser
Do you know how frustrating it can be to wait endlessly for a patient's CD to open?
Will your browser still require you to install additional programs before you can actually read the image?
Try RadiAnt DICOM Viewer autoplay package! This is absolutely fast, CD/DVD playback software does not require installation on Windows XP SP3, Vista, Windows 7, Windows 8, Windows 8.1, and Windows 10, nor does it require any additional software or programs to be installed. (e.g. NET, Java).
If the user's operating system allows, the 64 bit version can open files more efficiently. The old machine uses a 32-bit version. This medium added only about 6MB of data.
After opening the program, the logo pattern will be displayed, which is completely customizable and can be used in the information your company provides to customers.
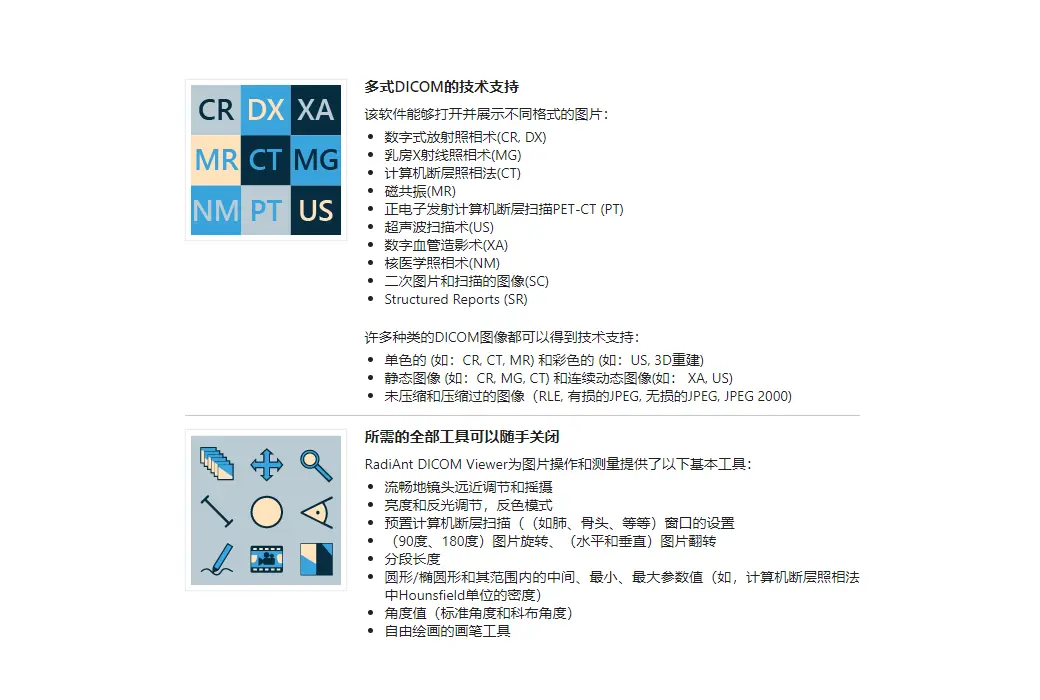
All necessary tools can be easily closed
RadiAnt DICOM Viewer provides the following basic tools for image manipulation and measurement:
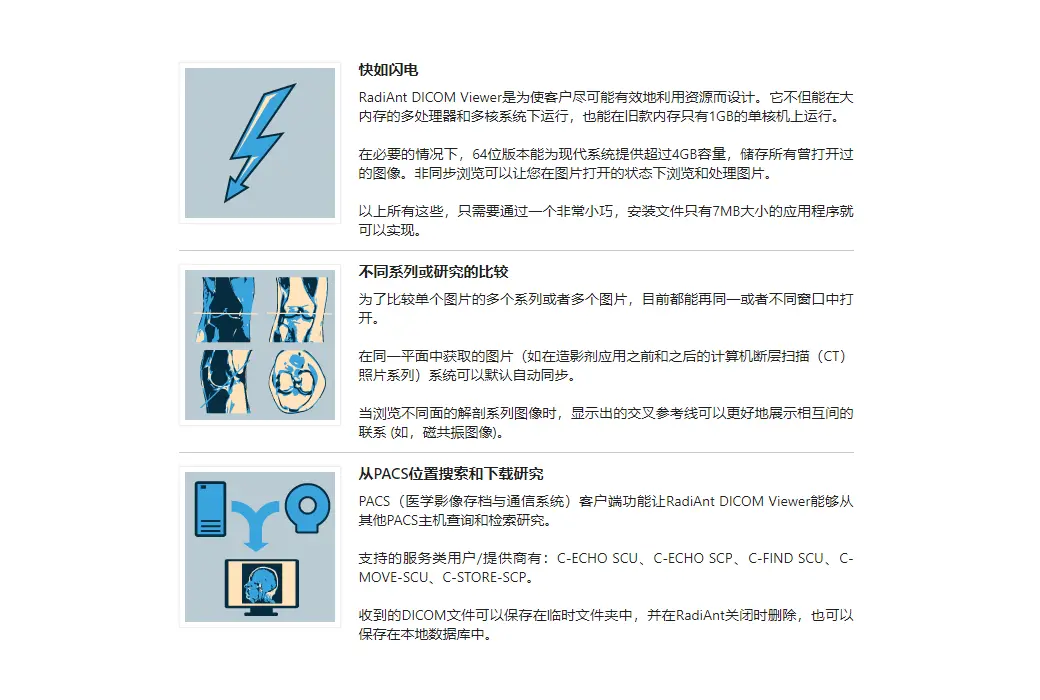
Fast as lightning
RadiAnt DICOM Viewer is designed to enable customers to utilize resources as efficiently as possible. It can run not only on multiprocessors and multi-core systems with large memory, but also on older single core machines with only 512MB of memory.
If necessary, the 64 bit version can provide over 4GB of capacity for modern systems to store all previously opened images. Asynchronous browsing allows you to browse and process images while they are open.
All of the above can be achieved through a very compact application with an installation file size of only 7MB.
Search and download research from PACS location
The PACS (Picture Archiving and Communication System) client feature allows the Radiant DICOM viewer to query and retrieve studies from other PACS hosts.
The supported service users/providers include: C-ECHO SCU, C-ECHO SCP, C-FIND SCU, C-MOVE-SCU, C-STORE-SCP (only accepts launches from Radiant DICOM Viewer)
Transmission. If you attempt to send studies from other PACS nodes without first searching for them and starting the download in RadiAnt, they will be ignored. The received DICOM files are stored in a temporary folder and deleted when RadiAnt is closed.
Technical support for multimodal DICOM
This software can open and display images in different formats:
Many types of DICOM images can receive technical support:
Comparison of different series or studies
In order to compare multiple series or multiple images of a single image, they can currently be opened in the same or different windows.
The system can automatically synchronize images obtained in the same plane (such as computed tomography (CT) photo series before and after contrast agent application) by default.
When browsing anatomical series images of different faces, the displayed cross reference lines can better demonstrate the connections between each other (such as magnetic resonance images).
Convert DICOM files into images and videos
In order to create excellent visual presentations and professional publishing, RadiAnt DICOM Viewer can convert DICOM files into JPEG format images (compressed) or BMP format images (uncompressed bitmap) and WMV videos (Windows media videos).
A single image, a complete series, or all opened images can be converted simultaneously.
By using shortcut keys and simultaneously pressing CTRL+C, the displayed images can be quickly copied to the Windows clipboard and easily pasted into Word or PowerPoint documents.
Multidimensional reconstruction
The MPR tool provided by RadiAnt DICOM Viewer can be used to reconstruct images in orthogonal planes (coronal, radial, axial, oblique, depending on the fundamental plane of the image).
The reconstruction process is quite fast: it can reconstruct coronal position images from over 2000 axial CT slices in about three seconds (on modern Intel Core i7 systems).
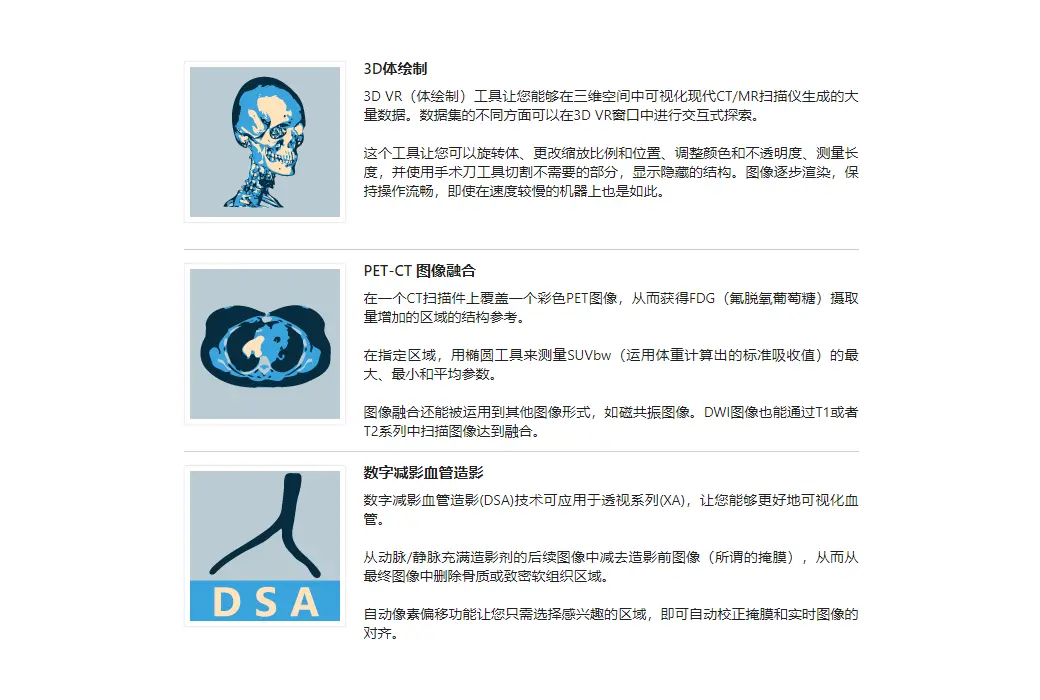
3D Volume Rendering
3D VR (Volume Rendering) tools allow you to visualize large amounts of data generated by modern CT/MR scanners in three-dimensional space. Different aspects of the dataset can be explored interactively in a 3D VR window.
This tool allows you to rotate the volume, change the zoom level and position, adjust color and opacity, measure length, and display hidden parts by cutting through unwanted parts of the roll using a surgical knife tool
Structure. The image will gradually render and maintain fluid operation even on slower machines.
PET-CT image fusion
Overlay a color PET image on a CT scan to obtain a structural reference of the area with increased FDG (fluorodeoxyglucose) uptake.
In the designated area, use the ellipse tool to measure the maximum, minimum, and average parameters of SUVbw (standard absorption value calculated using body weight).
Image fusion can also be applied to other forms of images, such as magnetic resonance imaging. DWI images can also be fused by scanning images in the T1 or T2 series.
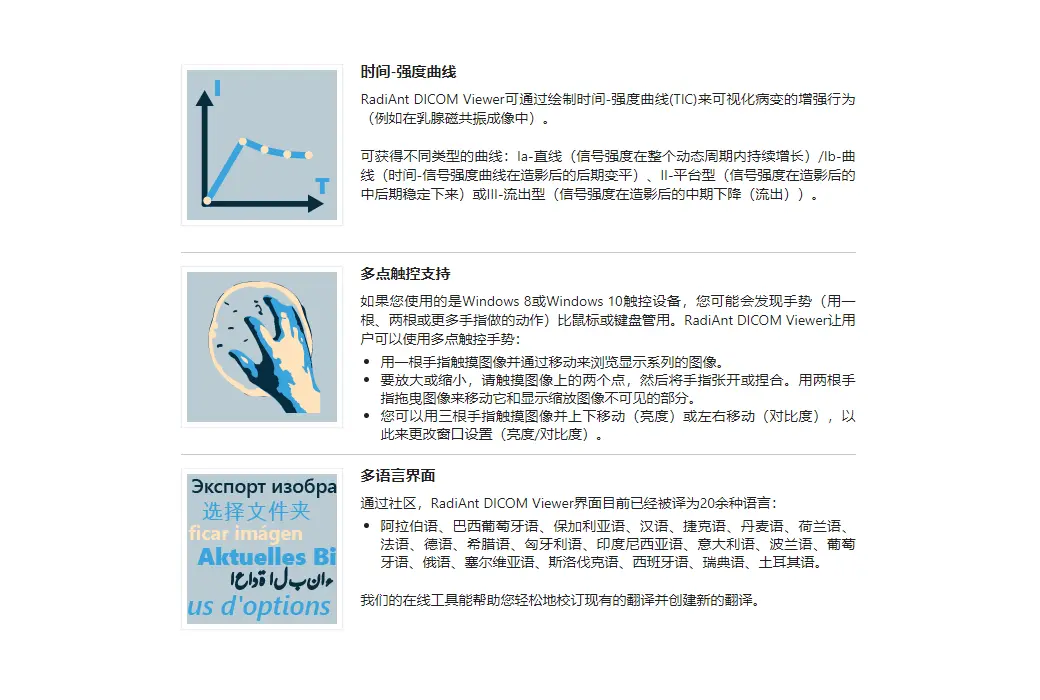
Time intensity curve
The Radiant DICOM viewer allows you to visualize the enhanced behavior of lesions by drawing a Time Intensity Curve (TIC) (e.g. in breast MRI).
Different types of curves can be obtained: Ia - straight line (signal strength continues to increase throughout the dynamic cycle)/Ib - curve (time signal strength curve flattens in the later contrast period), II - plateau (signal strength plateau in the middle and later contrast periods), or III - washout (signal strength decreases in the middle and later contrast periods (washout).
Multi touch support
If you have a Windows 8 or Windows 10 device that supports touch, you may find gestures (actions performed using one, two, or more fingers) to be easier to use than a mouse or keyboard.
Radiant DICOM Viewer enables users to use multi touch gesture arrays:
Touch the image with one finger and move it to browse the displayed series of images.
To zoom in or out, touch two points on the image and then move your finger away or towards the other person. Drag the image with two fingers to move it and display the invisible part of the zoomed in image.
You can change the window settings (brightness/contrast) by touching the image with three fingers and moving it up/down (brightness) or left/right (contrast).
Official website:https://www.radiantviewer.com/
Download Center:https://radiant-dicom-viewer.apsgo.cn
Backup Download:N/A
Delivery time:Manual online processing of orders
Operating platform:Windows
Interface language:Supports Chinese interface display, with multiple languages available.
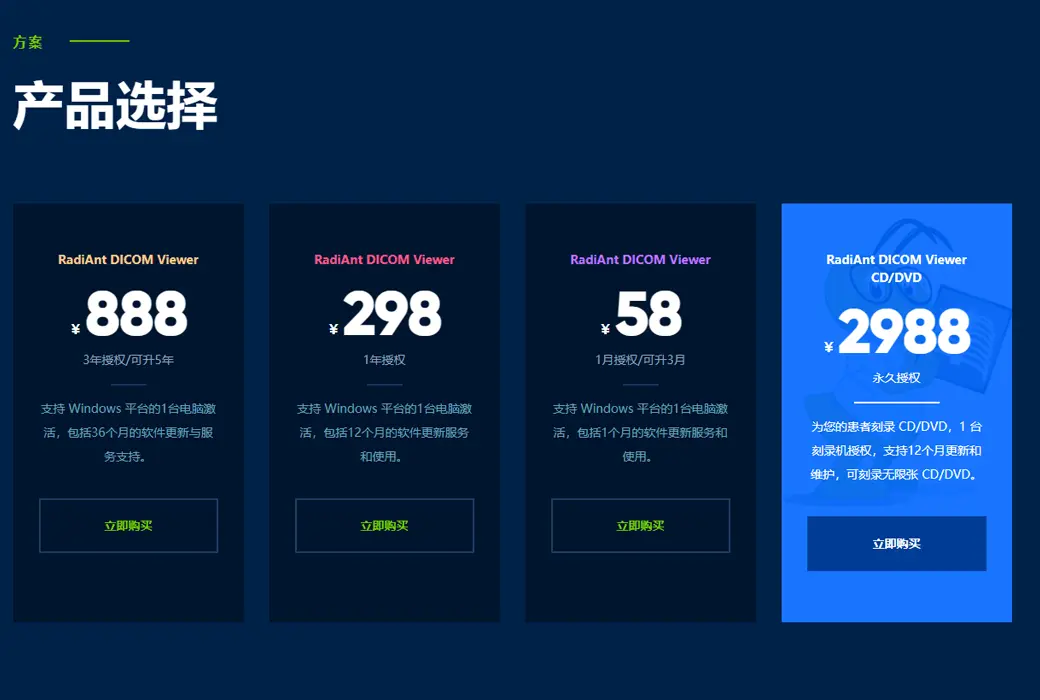
Update instructions:Lifetime version: includes 1 year of upgrade, maintenance, and update services. After 1 year, only the current version can be used. 1-year subscription: Used and updated within 1 year.
Pre purchase trial:90 day free trial.
How to receive the goods:After purchase, the activation information will be sent to the email address at the time of placing the order, and the corresponding product activation code can be viewed in the personal center, My Orders.
Number of devices:Can install 1 computer.
Replacing the computer:Uninstall and remove authorization from the original computer, and reactivate the new computer with a registration code.
Activation guidance:To be added.
Special instructions:CD/DVD version: You cannot use this license to view images yourself. This license is for patients to use on a DVD, making it convenient for them to view their own images without purchasing a license.
reference material:https://www.radiantviewer.com/products/

Any question

RadiAnt DICOM Viewer keyboard shortcuts2D Viewing Window - Global Keyboard Shortcuts
Ctrl + O
Open DICOM file
Ctrl + Shift + O
Scan DICOM folder
Ctrl + Alt + O
Open DICOM CD/DVD
Ctrl + F
Search and download research from PACS location
B
Select series browsing tool
W
Select Image Window Width/Level (Brightness/Contrast) Adjustment Tool
M
Select Image Flattening Tool
Z
Select Image Scaling Tool
L
Choose a length measurement tool
E
Select Ellipse Tool
G
Select the Closed Polygon Tool
O
Select Open Polygon Tool
A
Select angle measurement tool
C
Choose Cobb angle measurement tool
D
Choose a deviation measurement tool
Y
Select Arrow Tool
P
Select Brush Tool
Ctrl + Shift + E
Time intensity curve tool
Ctrl + Shift + Plus (+)
Increase ROI font size
Ctrl + Shift + Minus (-)
Reduce ROI font size
F12
Switch annotation display
Shift + F12
Switch visibility of all patient data
Ctrl + F12
Switching cross reference lines
Ctrl + Shift + F12
Switch DICOM overlay
F5
Switch series synchronization mode
F
Switch between full screen/window mode
Shift + Alt + Enter
Switch to interference free mode
Ctrl + Alt + F3
Switch the visibility of the toolbar and status bar
Ctrl + Alt + F2
Switch the visibility of the series preview bar
Ctrl + E
Display export as JPEG/BMP/WMV window
F4
Open multiple series
Shift + F4
Close all panels
F1
Display online help
F8
Open default database
Ctrl + F8
Create a new database
Shift + F8
Open an Existing Database
Ctrl + N
Open a new window
Ctrl + Shift + N
Copy Window
Ctrl + Alt + F4
Exit RadiAnt
-------------------------------------------------------------------
2D Viewing Window - Local Keyboard Shortcuts (Send to Activity Panel)
-------------------------------------------------------------------
Tab
Activate the next panel
Shift + Tab
Activate the previous panel
Ctrl + F4
Close the activity panel
Ctrl + M
Maximize/Restore Activity Panel
left arrow
Display the previous series
right arrow
Display the next series
Home
Display the first series
End
Display the last series
up arrow
Go to the previous image
down arrow
Go to the next image
Page Up
Skip 10 images forward
Page Down
Skip 10 images backwards
Ctrl+arrow keys
Translate image
Ctrl + Plus (+)
amplify
Ctrl + Minus (-)
reduce
Ctrl + 0
Adapt the image to the panel
Ctrl + 1
Set zoom to 100% (1 image pixel=1 screen pixel)
Ctrl + 2
Set the zoom to 200%
Ctrl + 3
Set the zoom to 400%
Ctrl + 4
Set the zoom to 800%
0
Default window width/level (brightness/contrast) settings
1
Full dynamic brightness/contrast
2
Second window width/level preset (abdomen in CT image)
3
Third Window Width/Level Preset (Angiography of CT Images)
4
4th Window Width/Level Preset (Bones in CT Images)
5
5th Window Width/Level Preset (Brain in CT Images)
6
The 6th window width/level preset (chest in CT image)
7
7th Window Width/Level Preset (Lung in CT Image)
8
8th Window Width/Level Preset
9
9th Window Width/Level Preset
Ctrl + F11
Customize window width/level
F11
reverse image
Space
Start/Stop Movie Mode
Ctrl + C
Copy the selected ROI
Copy the displayed image to the clipboard
Ctrl + Shift + C
Copy and display all ROIs in the image
Ctrl + V
Paste ROI
Ctrl + Shift + D
Copy ROI in the corresponding series
Shift + Alt + D
Copy ROI from all images in the series
Del
Delete the selected ROI
Shift + Del
Delete ROI from all visible images
Ctrl + Del
Delete all ROIs in the displayed image
Ctrl + Shift + Del
Delete all ROIs in the display series
Esc
Deselect ROI
Alt + F12
Switch the visibility of ROI
Ctrl + [
Rotate the image counterclockwise by 90 degrees
Ctrl + ]
Rotate the image clockwise by 90 degrees
Ctrl + Shift + [
flip horizontal
Ctrl + Shift + ]
flip vertical
*Ctrl + Shift + *
Clear Transform
Ctrl + I
Next image filter
Ctrl + Shift + I
Previous Image Filter
I
Next sharpening filter
Shift + I
Disable filter
Ctrl + Alt + 1
Coronary Multi Plane Reconstruction (MPR)
Ctrl + Alt + 2
Sagittal Multi Plane Reconstruction (MPR)
Ctrl + Alt + 3
Axial Multi Plane Reconstruction (MPR)
F3
3D volume rendering
Ctrl + Alt + F
Switch image fusion
/
Switch subtraction
Shift + M
Select manual pixel offset tool
Ctrl + M
Select the automatic pixel offset tool
Shift + /
Use the current image as a mask
Ctrl + Shift + /
Reset Mask
Ctrl + Alt + /
Segmentation mask
.
Magic Mask
Ctrl + Alt + T
Display DICOM tags for displaying images
Ctrl + F5
Split Series
Shift
Press to make the ellipse circular when drawing an ellipse, and press to make the line segment horizontal or vertical when drawing a line segment
Ctrl
Press to display the actual pixels used for calculation when drawing an ellipse (only in the enlarged image)
Enter
Open the displayed Structured Report (SR) document in an internal HTML browser
Open the displayed MPEG 2/4 video in an external media player
Open the displayed PDF in an external browser
Ctrl + Enter
Open the displayed Structured Report (SR) document in an external HTML browser
Local Archive Window
Ctrl + Shift + O
Import DICOM folder
Ctrl + O
Import DICOM file
Ctrl + Alt + O
Import DICOM discs from CD/DVD
Ctrl + F
Search and import research from PACS server
Ctrl + E
Export selected research/series
Del
Delete the selected study/series
K
Add keywords to the selected research
Enter
Open the selected research in the activity window
Ctrl + Enter
Open the selected study in a new window
Shift + Enter
Add the selected research to the activity window
Ctrl + Shift + Enter
Open the selected study in a separate window
Ctrl + F8
Create a new database
Shift + F8
Open an Existing Database
Ctrl + N
Open a new viewing window
Alt + F
screening study
F2
Loop View (Research/Series/Images)
3D Volume Rendering Window
Left/Right Arrow
Rotate the volume around the Y-axis
Up/down arrows
Rotate the volume around the X-axis
< / >
Rotate the volume around the Z-axis (rolling)
Ctrl+arrow keys
Translate image
Ctrl + Plus (+)
amplify
Ctrl + Minus (-)
reduce
Ctrl + 0
Adapt the volume to the panel
0
Default window width/level (color/transparency) settings
Ctrl + S
Switch Shadows
Ctrl + R
Reset scene
Ctrl + Alt + 0
Restore Volume
R
Select 3D Rotation Tool
T
Select scrolling tool
W
Select Image Window Width/Level (Color/Transparency) Adjustment Tool
Ctrl + F11
Customize window width/level
M
Select image translation tool
Z
Select Image Scaling Tool
S
Choose surgical knife tools
Ctrl + Z
Revoke surgical knife operation
Ctrl + Y
Redo the surgical knife operation
Ctrl + Shift + Alt + Z
Clear surgical knife history
L
Choose a length measurement tool
Y
Select Arrow Tool
1
Front view
2
Rear view
3
left side view
4
Right Side View
5
Top view
6
View below
Ctrl + C
Copy the displayed image to the clipboard
Ctrl + E
Save the image as a JPEG file
F2
Create a quick video
Ctrl + F2
Create advanced videos
Del
Delete the selected ROI
Crop the internal area
Enter
Crop the external area
Esc
Deselect ROI
clear area
F12
Switch annotation/orientation cube
F
Switch between full screen/window mode
Ctrl + Alt + F3
Switch the visibility of the toolbar
F3
Display 3D snapshot
K
Take 3D snapshot
]
Next 3D snapshot
[
Previous 3D snapshot
Ctrl + F3
Load 3D snapshot from file
Shift + F3
Save 3D snapshot to file
3D MPR Window
Left/Right Arrow
Rotate the view around the Z-axis (scroll)
Up/down arrows
Browse the front and back directions of the volume
Alt+up/down arrows
Rotate the image plane around the X-axis
Alt+left/right arrows
Rotate the image plane around the Y-axis
Ctrl+arrow keys
Translate image
Ctrl + Plus (+)
amplify
Ctrl + Minus (-)
reduce
Ctrl + 0
Fill viewport
0
Default window width/level (color/transparency) settings
Ctrl + F11
Customize window width/level
F11
reverse image
Ctrl + R
reset view
B
Select browsing tool
R
Select 3D Rotation Tool
T
Select scrolling tool
W
Select Image Window Width/Level Adjustment Tool
M
Select image translation tool
Z
Select Image Scaling Tool
L
Choose a length measurement tool
E
Select Ellipse Tool
G
Select the Closed Polygon Tool
O
Select Open Polygon Tool
A
Select angle measurement tool
Y
Select Arrow Tool
H
Choose a thickness measurement tool
Plus (+)
Increase thickness
Minus (-)
Reduce thickness
F2
Switch rendering mode
F3
Switch the visibility of coordinate axes
Ctrl + F3
Center all coordinate axes
F4
Next viewport layout
Tab
Activate the next viewport
Shift + Tab
Activate the previous viewport
Ctrl + C
Copy the image to the clipboard
Shift + C
Copy all images to the clipboard
Ctrl + E
Save the image as a JPEG file
Shift + E
Save all images as JPEG files
Del
Delete the selected ROI
Enter
Maximize/restore active viewport
Esc
Deselect ROI
F
Switch between full screen/window mode
Ctrl + Alt + F3
Switch the visibility of the toolbar
PACS search window
Enter
Download the selected research to the activity viewing window (clear previously opened research)
Shift + Enter
Add the selected research to the activity viewing window
Ctrl + Enter
Download the selected research to a new viewing window
Ctrl + Shift + Enter
Download and display the selected research in a separate window
Ctrl + P
Find all studies for the selected patient
Ctrl + Del
Cancel all downloads and searches for activities
Ctrl + O
PACS configuration
Ctrl + L
Display activity and completed download lists, as well as detailed statistical information and status messages
Ctrl + S
Display series list
Ctrl + F5
Refresh series list
F2 - F12
Perform PACS search using saved presets
PACS configuration window
Ctrl + Up
Increase the priority of selecting PACS locations
Ctrl + Down
Reduce the priority of selecting PACS locations
Del
Delete the selected PACS location
F2
Verify PACS location (C-ECHO)
DICOM Label Window
Ctrl + O
Display DICOM files in Explorer
Ctrl + C
Copy the selected label to the clipboard
Ctrl + Shift + C
Copy all labels to the clipboard
Ctrl + Shift + V
Copy label values to clipboard
Ctrl + S
Save the RAW values of the selected tags to a file
🔗 Source text link:https://www.radiantviewer.com/dicom-viewer-manual/keyboard_shortcuts.html